Unveiling the Art of Expert Tree Removal: A Guide for Homeowners

Trees are a beautiful addition to any landscape. They provide shade, beauty, and even fruits. However, there are instances when tree removal becomes necessary. Whether it’s due to disease, damage, obstruction, or aesthetics, understanding the basics of tree removal is crucial for homeowners. In this guide, we will explore the process of professional tree removal, how to select a reliable tree removal service, and the necessary steps to prepare your property for tree removal. Let’s dive in!

Understanding the Basics of Tree Removal

Tree removal is a complex process that requires careful consideration and expertise. It is often necessary to ensure the safety of your property and loved ones. Trees affected by diseases or infestations can pose a threat, as they may weaken and fall, causing damage to structures or even endangering lives. Additionally, trees that obstruct power lines or interfere with the growth of other plants may need to be removed to maintain a healthy and balanced ecosystem.

When it comes to tree removal, it is important to understand the various factors involved. Identifying trees that require removal is the first step. Look for signs such as significant decay, large dead branches, leaning trunks, root damage, or extensive pest infestations. These issues indicate a compromised tree that may need to be removed sooner rather than later.

Once you have identified a tree that needs to be removed, it is crucial to assess the risks involved. Tree removal can be a dangerous task, especially without the proper knowledge and equipment. Falling branches or trees, power line accidents, and injuries from chainsaws are just a few of the potential hazards. Therefore, hiring a professional tree removal service is highly recommended.

Expert Tree Removal

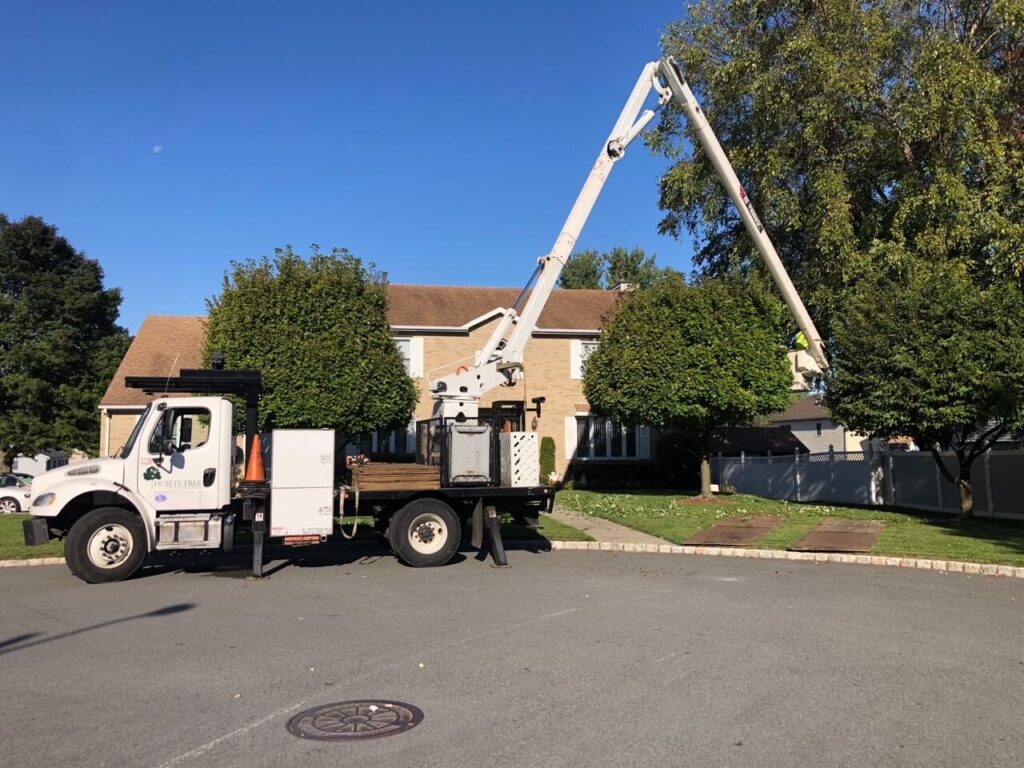
Professional tree removal services have the expertise and experience to safely remove trees. They have the necessary equipment, such as cranes and chainsaws, to efficiently and effectively remove trees without causing any harm. They also have the knowledge to assess the situation and determine the best approach for tree removal, taking into consideration factors such as the tree’s size, location, and surrounding structures.

When hiring a tree removal service, it is important to choose a reputable and qualified company. Look for certifications and licenses, as well as positive reviews and testimonials from previous clients. Additionally, make sure the company has insurance coverage to protect you and your property in case of any accidents or damages during the tree removal process.

Overall, understanding the basics of tree removal is essential for maintaining a safe and healthy environment. By being aware of the signs that indicate a tree needs to be removed and the risks involved in DIY tree removal, you can make informed decisions and ensure the well-being of your property and loved ones.

The Process of Professional Tree Removal

Tree removal is a complex process that requires careful assessment, planning, and execution. Professional arborists are trained and equipped to handle this task efficiently and safely. Let’s take a closer look at the various stages involved in the process.

Initial Assessment and Planning

Before the tree removal process begins, a professional arborist will conduct a thorough assessment of the tree and the surrounding area. This evaluation helps them determine the best approach for removal, taking into consideration factors such as the tree’s condition, its location, and any potential obstacles. The arborist will inspect the tree for signs of disease, decay, or structural instability. They will also assess the proximity of buildings, power lines, and other structures to ensure a safe removal process.

Based on their assessment, the arborist will develop a detailed plan for the removal. This plan will outline the specific techniques and equipment required to safely and efficiently remove the tree. Proper planning is essential to minimize risks and ensure a successful removal.

Cutting Techniques and Equipment

Once the assessment is complete and the removal plan is in place, the arborist will carefully execute the plan using specialized equipment and cutting techniques. Different trees may require different methods, such as sectional cutting or felling, to ensure a controlled and safe removal process.

Sectional cutting involves removing the tree in smaller sections, starting from the top and working downwards. This technique is often used when there are obstacles nearby or when the tree is in a confined space. Felling, on the other hand, involves cutting the tree at the base and allowing it to fall in a predetermined direction. This method is suitable for trees with ample space and no obstructions.

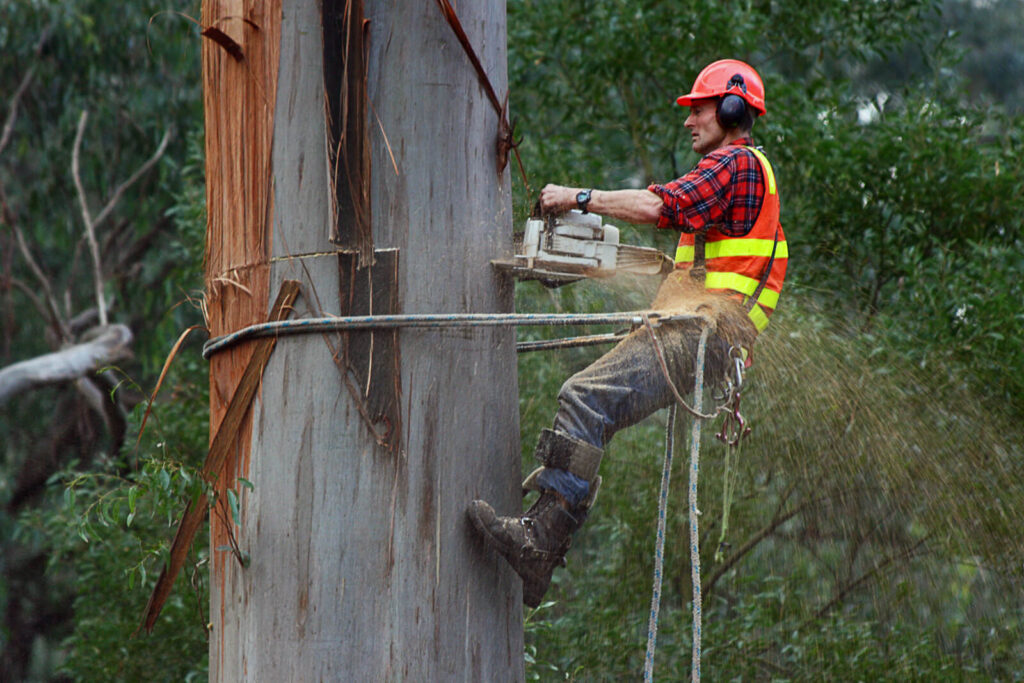
Professional arborists have the knowledge and experience to employ these techniques effectively. They use specialized equipment, such as chainsaws, ropes, and rigging systems, to safely cut and remove the tree. Safety precautions, such as wearing protective gear and using proper climbing techniques, are always followed to minimize the risk of accidents.

Expert Tree Removal

Stump Removal and Cleanup

After the tree is felled and removed, the arborist will address the remaining stump. Stumps can be unsightly and can also pose tripping hazards, so it’s important to remove them properly.

The arborist will determine the most suitable stump removal technique based on factors such as the size and location of the stump. Grinding is a common method used for smaller stumps. A stump grinder is used to chip away at the stump until it is below ground level. For larger stumps or those in sensitive areas, full excavation may be necessary. This involves digging out the entire stump, including the root system.

Thorough cleanup is then conducted to remove any debris and restore the area to its original condition. The arborist will remove all branches, twigs, and other tree remnants from the site. They will also rake and level the ground, ensuring that no trace of the tree removal process remains.

Tree removal is a task that should always be left to the professionals. Hiring a certified arborist ensures that the process is carried out safely, efficiently, and in compliance with local regulations. If you have a tree that needs to be removed, contact a reputable tree care company to schedule an assessment and discuss your options.

Selecting a Tree Removal Service

When it comes to selecting a tree removal service, there are several important factors to consider. Not only do you want to ensure that the service provider is qualified and reliable, but you also want to make sure that they adhere to industry standards and practices. In this article, we will explore some key credentials to look for, questions to ask potential services, and factors to consider when it comes to cost.

Credentials to Look For

One of the first things you should look for when selecting a tree removal service is their credentials. Certifications from professional organizations such as the International Society of Arboriculture (ISA) or the Tree Care Industry Association (TCIA) can provide you with peace of mind knowing that the service provider has met certain standards of expertise and professionalism. These certifications ensure that the service provider has the necessary knowledge and skills to safely and effectively remove trees.

Additionally, you may want to inquire about any other relevant certifications or licenses that the service provider holds. For example, if you live in an area where certain tree species are protected, you may want to ensure that the service provider has the necessary permits to legally remove those trees.

Questions to Ask Potential Services

Before making a final decision, it is important to ask potential tree removal services a series of questions to ensure their reliability and expertise. Here are some important questions to consider:

  1. How much experience do you have? It is important to choose a service provider with a proven track record of successfully removing trees. Ask about their experience in the industry and if they have any specialized expertise.
  2. Do you have insurance coverage? Tree removal can be a risky job, so it is crucial that the service provider has the necessary insurance coverage to protect both themselves and you as the homeowner. Ask for proof of insurance and make sure it is up to date.
  3. What equipment do you use? The equipment used by the service provider can greatly impact the efficiency and safety of the tree removal process. Inquire about the type of equipment they use and whether it is well-maintained.
  4. What safety protocols do you follow? Safety should always be a top priority when it comes to tree removal. Ask about the safety protocols the service provider follows to ensure that they take the necessary precautions to protect both their workers and your property.
  5. Can you provide references? Requesting references from past clients can give you valuable insight into the quality of the service provided. Reach out to these references and ask about their overall satisfaction with the service.
Expert Tree Removal

Understanding Cost Factors

When it comes to the cost of tree removal, there are several factors that can influence the overall price. Some of the key factors to consider include:

  • Size and condition of the tree: Larger and more complex tree removals may require additional equipment and manpower, which can increase the cost.
  • Accessibility: If the tree is located in a hard-to-reach area, such as a backyard with limited access, it may require more time and effort to remove, resulting in higher costs.
  • Pricing structure: Different service providers may have different pricing structures. Some may charge a flat fee, while others may charge based on the size and complexity of the job. It is important to understand the breakdown of costs and compare quotes from multiple providers.

While cost is an important factor to consider, it should not be the sole determining factor in your decision-making process. Choosing a reputable service provider based on their expertise, reliability, and adherence to safety standards should be a priority. Remember, investing in a qualified and professional tree removal service can help ensure the safety of your property and the surrounding environment.

Preparing Your Property for Tree Removal

Safety Measures to Consider

Prior to tree removal, it is crucial to prioritize safety. Ensure that children and pets are kept away from the work area. Additionally, clear any potential obstacles or hazards that may hinder the removal process, such as vehicles or fragile objects. By taking these safety measures, you help create a secure environment for the arborists and minimize the risk of accidents.

Legal Permissions and Restrictions

Before removing a tree, check with your local municipality or homeowner’s association to determine if any permissions or permits are required. Some locations may have restrictions or regulations regarding tree removal, especially if the tree is protected by law. It is important to comply with these regulations to avoid legal issues.

Post-Removal Landscape Restoration

Once the tree is removed, you may want to consider the restoration of your landscape. Consult with an arborist or a landscaping professional to determine the best course of action. They can provide advice on planting new trees, shrubs, or flowers to enhance the beauty of your property.

As a homeowner, understanding the art of expert tree removal is essential for maintaining a safe and appealing environment. By recognizing the signs that necessitate tree removal, selecting a reliable tree removal service, and preparing your property accordingly, you can ensure a smooth and successful tree removal process. Remember, safety should always be the top priority!

4 Interesting Ways to Use Subway Tiles in 2021

Many people do not fancy the subway tiles too much because they think they can be tedious. Nevertheless, I bet that many of them have only seen a limited number of subway tiles patterns to draw that conclusion. More so, many prominent interior decorators would agree that subway tiles seem not to be going anywhere in terms of trend. Therefore, you had better get to love it and make the best out of it. 

Subway tiles are neutral, inexpensive, and timeless, all in one package. I still wonder why anyone would hate them. Perhaps, such people are too engrossed with the effect of cement tile, colored tiles, and mosaic tiles. But even then, you should not hate the fact that subway tiles can bring a new dimension to whatever style you want to create. In a way, subway tiles can tone down to balance the otherwise busy surface of concrete and other materials. 

Therefore, the fact that you choose subway tiles does not in any way suggest that you are boring. It only implies that you enjoy retaining flexibility and the ability to recreate your design. So, below are the top 4 ways to use the subway tiles without creating a boring layout in the home interior.

4 Ways to Create Subway Tiles

  1. Disappearing Act

You can create subway tiles for the sole purpose of causing the surface to ‘disappear.’ The part of subway tiles that can stand out of obscurity can also be used to secure any part of the home interior. You may not even notice that the tiles are perfect until you deliberately look in the direction. Therefore, they create hide away the part of the room to create an avenue for other materials and items. 

Furthermore, when you create subway tiles to do a disappearing act, the whole idea revolves around other items aside from the tiles. For instance, you cannot have arabesque tiles on an accent wall, but you can lay subway tiles behind a shower faucet in the bathroom. You make it impossible for the wall pattern to get in the way of how you perceive the room. Meanwhile, the center of focus remains in view. In such a use, ensure that the grout you choose has the same color as the color of the subway tiles. Otherwise, the contrast color would bring the tiles into prominence. For example, use white grout for white subway tiles. 

  1. Try Vertical

Another way to make your bathroom look uncommon is to use a vertical approach to your subway tiles installation. There is practically no rule that says your tiles must always be horizontal or at a particular angle. You can choose to arrange your tiles in any way that you like, only that you may find out that there is already a name for the style you just created. So, in the real sense. Many times, subway tiles will suit the wall perfectly when arranged vertically. 

Meanwhile, instead of using the typical 3 x 6 inches subway tile size, why not try the 4 x 10 inches? Experience with this vertical idea suggests that the larger tiles with the vertical spin make the bathroom more different. At the same time, the vertical subway tiles pattern can also add a modern spin to the otherwise traditional look of tiles. However, you may have to do it in the vertical brick pattern on the long ends.

Once you have such creativity in your bathroom, you can add a modern shower and curtains to perfect the look. As a professional, I will counsel that the best way to describe your design to a tiler or designer is to draw it on paper and stick it to the wall. As soon as you outline the example on wall, there is hardly any chance of misunderstanding or misinterpretation of the description. Another tip is that be sure you know that a vertical pattern is different from a vertical brick pattern.  Click here to read about A Full Guide on Ceramic Subway Tiles in Sydney.

  1. Herringbone Version One and Two

In the herringbone pattern of laying subway tiles, the designer creates some fun with the area. For instance, each tile is applied at an angle of 45-degrees to the next, and it can make a bold statement on your accent wall. However, if you intend to make each tile stand out in the pattern, you can use a charcoal grout for white subway tiles. Meanwhile, you can also make each tile at an angle of 90-degrees to each other in the herringbone tile pattern. 

On the other hand, the herringbone version two involves laying the tiles in slanting form, even if the angle remains the same. This pattern can also add to the glamour of the bathroom in particular. By the way, we have some professional tips to help you get the best results from the herringbone pattern of subway tiles. The first tip is to ensure that your designer understands how you want the herringbone pattern to go. Draw them out to avoid any misinterpretation. The second important tip is to set a clear goal of what you want to design to be sure when you have it. 

  1. Stick with the Classic

The word ‘classic’ does not refer to something being old; it instead speaks of its relevance in the present. For instance, you think of classical songs, and you know that though they were composed several years ago, they remain relevant. If we apply that to what we have with the classic pattern of laying subway tiles, we will discover a new feeling about what you want. Instead of just overshooting the budget with the latest design and materials, stick to the classic choice.

One traditional way to arrange the subway tiles is to have them alternating on top of each other in a brick fashion. You are going to love it on your bathroom walls because of its uniformity. Moreover, you can build on the appearance to make other room parts, such as the ceiling and the floor. 

Conclusion

On a final note, the subway tiles do not have to be boring in their pattern except for creativity. But wherever you get professionals to handle them, the ways above will put away doubt and build an irresistible edifice. Tile and Bath Co is also a dependable outfit to meet all your material needs for interior home decorations. We sell all kinds of classic subway tiles to match your needs. 

Show Us Your Home – Kitchen Tour

Kelly, over at Kelly’s Korner Blog, started a “show us where you live” blog party. This week, we are to post images of our kitchen area. If you are like me and love to drive around and look at homes – especially when they open up the interiors of them – then you will love this blog tour. It gives you the ability to get ideas and see inside the homes of hundreds of homes. Should you have a blog and want to participate, feel free. Post photos of your kitchen and then link your blog from Kelly’s. I took these shots really early this morning (well most of them anyhow – some were taken on a different day – months earlier) and therefore the quality of the images is poor due to the lack of early morning lighting. I hope you can still make out the gist of it all though. I’m bringing you into our kitchen from the outer hallway. It leads from the garage, into our mudroom, and then into this hall.

4 Interesting Ways to Use Subway Tiles in 2021

This is a pass-thru hall that leads directly either into our kitchen, off to our laundry room, or upstairs. Since we are showing images of kitchens, we will be heading straight into the kitchen itself.

Our “This house believes” sign – shown below – is one of my most favorite things we own. It’s actually a cabinet door that has been painted and an old cross applied to it. The open door there on the left leads into the butler’s pantry. More on that in a sec…
And into the kitchen, we go…bad lighting and all…

For some reason, the lights look gold and yellow in here with the time of day it was. All of our lighting fixtures are actually silver.

In the glass cabinets, I keep a lot of beach-style dishes. Dishes to do with the sea, starfish, etc. Some are white, some are blue. The closed-off glass pocket door you see in the picture below is actually where I like to hide from the kids when on the phone. I can shut the door and make calls when I need quiet. There is a desk and more cabinets/draws in there.

This is a view (below) from the kitchen looking back into the hallway where we started. It leads to the mudroom, or upstairs, to the garage, to the laundry room, and also to the butler’s pantry.

This is a breezeway area that leads from our kitchen into our formal dining room – below.

And below we have the formal dining room. We still need a buffet table for the far left wall in here. Unfortunately, I have yet to find the exact piece I’m looking for.

Below…looking at the breezeway hutch from our main foyer hallway/Part of the entryway. The dishes I have in these glass cabinets are my Step-Moms grandmother’s dishes. They go beautifully in here. My Dad and Cathy gave them to us when we first moved into this house. They knew that they’d look perfect in that spot and they do! Very sentimental dishes to me. I treasure them each time I walk by them.

And back to the kitchen…

Next up -back to the butler’s pantry (below). Normally this door stays open unless we are having company over. If people are here, I close it.

All of our pantry food items go in here on these shelves. I also keep lunch boxes, baking supplies, (not that I use them), etc. in here.

Again, below…we are back to the kitchen overlooking the hearth room and the great room. I am one that doesn’t care for things sitting around on my countertops. I like to have open and clean spaces. Wide-open areas. No clutter aloud.

Below, this is the hearth room. It’s where the kids spend most of their time when I’m in the kitchen.

Looking back into the kitchen from the eat-in dining area off the kitchen. Truthfully, we rarely use this vanilla table. Because we are a family of four, we fit perfectly at the counter stools in front of the sink when eating.

I love the striped rug under the vanilla table. Definitely gives off that beachy vibe that I soooooo love! Below we have a view from our guest bath hallway looking around the corner of the kitchen into the heart and formal great room.

Below, I’m standing on the left side of the great room looking into the kitchen. Our great room is another favorite area of my house. I’ve tried to give it a very seaside vibe. It’s a work in progress.

Remember that coffee table book I told you I got a couple of weeks ago? Well, it goes in here…And there you have it…the kitchen and surrounding areas. I think many of you have seen our kitchen before but I don’t think I’ve ever been shown the view from our great room and such. I can’t remember for sure. Either way, thanks to Kelly for a fun set of home tours. I’ve had a blast looking at everyone’s kitchen pictures. You should check them out too.

ISLAND COW, GUACAMOLE DIP, & STRESSORS

I’m pulling photos from the archives today because I am without my laptop. And without my laptop means I’m without any of my most recent images. Grrrrr! On Friday my laptop screen decided to take a nosedive. It just went blank with a bunch of stripes going up and down it. I immediately ran it over to Best Buy and their Geek Squad told me I’d have my baby back in 3 weeks. THREE WEEKS??? That is like death to some people – I included. How in the world am I supposed to go three weeks without my left arm? Needless to say, I’m feeling the pain. Photoshop, all of my actions, my current and past images over the last year, etc. are all on my laptop. I’m lost! I’m currently using my desktop computer which I don’t necessarily care for. It doesn’t have any of my current programs or anything on it. What a mess! So…for now, it looks as though I’ll be using older images that you’ve already seen anytime I plan to blog over the next three weeks. Oh, what a joy that is going to be. LOL! Bare with me…I’m keeping my fingers crossed that three weeks go by in a jiffy.

Karen flew into town and spent the past 4 days with me before she had to head on over to the East coast of Florida for a concert she was attending. We had a great time eating at all of the restaurants I’ve wanted to try but just haven’t had a chance yet. For those of you heading to the Sanibel Island area over Spring Break, you must eat at the “Island Cow.” It is this quaint little restaurant that I’ve always wanted to try but never had the chance until last week. It’s always packed out and therefore we never attempted to stop there because of the wait. It’s an outdoor restaurant with the most adorable hand-carved Adirondack chairs in every color of the tropical rainbow calling your name in their front yard. The chairs are handmade by a company here in town called “Tropic-chair” and I’m bound and determined to save up for some to place around our pool. They scream beach, tropics, sun, fun, etc.

Definitely a new favorite find of mine. The Island Cow restaurant has a menu the size of Texas which includes everything under the sun. I tried their lobster and shrimp wontons that were plated with a plum dipping sauce that day and devoured them along with their hand-squeezed orange juice and their chocolate chip muffins as a side filler. Oh yes, my tummy was in heaven. Keep in mind this stuff followed a bowl of guacamole dip that Karen and I woofed down in the car on the way to Sanibel that morning. Yes, can you tell it was my “cheat day?” I think it goes without saying that it was my one day off my diet and I made the best of it. And when my blender broke at home and it appeared that our lime chips and avocados were about to go to waste, Karen suggested duck tape for a quick fix. I never wavered – headed straight to the garage for Brent’s duck tape and we made that doggone blender work. You know you’re a guacamole addict when you tape up your blender with duck tape in order to make it work at 9:30am in morning. HA! Thank you, God for brilliant friends who suggest duck tape and for the duck tape itself. 🙂 Oh and here are a few photos I found on the Internet of the Island Cow atmosphere…

As you can tell, the Island Cow is a MUST when on Sanibel Island. I love the atmosphere. I love the colors. I love that it is an open-air restaurant. I love their food. I love the shirts they wear there. I loved it all. We will go back. I want to take the kids there sometime. Too fun! Lastly, I’ve had many people writing and asking how my doctor appt. with the cardiac electrophysiologist went yesterday. In a nutshell, he doesn’t think that my issues are the AV Node Tachycardia. THANK GOODNESS! Praise Jesus! Thank you for all of your prayers and well wishes. The doc says he is 90% sure that it is due to stress rather than the condition that requires surgery. He thinks my body is releasing a surge of adrenaline at night while I sleep and while my body processes the day. Because of that, I’m having severe palpitations as I’ve never had before and my medication is no longer working to help them. He basically told me that I needed to quit “stifling” my stress. (meaning don’t hold it in or push it deep down – deal with it!) Anyone who knows me well enough knows that it takes a lot to get me down. No matter what is going on in my life, my main goal is to keep trucking along. I refuse to let anyone or anything get the best of me. I read a quote yesterday that said…”Those things or those people that tried to destroy you, haven’t! Those things or those people who tried to kill you, didn’t! YOU’RE ALL THAT!!!” (by Paula White) I loved it. Thought the quote was a must share – so I did share it on Facebook with my crack book friends. 🙂 However, that attitude is apparently part of my problem. I need to start accepting my stress and owning it a bit more I guess. The doctor reiterated that the normal person who is stressed out hasn’t undergone a move across 5 states away from family, a life-altering heart diagnosis last year (the PFO), personal issues last July nor do they parent a special needs child on an hourly basis – day after day – and so forth. He told me that my stress level is beyond the norm and that I have to start balancing that out even though I might not feel stressed or feel as though it is as bad as it is. My problem is that I don’t look at my life as stressed.

I won’t give in to the enemy and allow my joy to be stolen. After my talk with the cardiac doctor yesterday though, I realize now that I can OWN my stress and still have joy. He said I needed to give myself extra long bubble baths, extra walks on the beach, pedicures, etc. that focus on me and me only. He said the body needs to balance and the only way to balance your life is to give yourself the time your body is requesting. I laughed and said “Well, apparently my 1-2 walks on the beach each week aren’t cutting it then. I’ll follow the doctor’s orders and increase that amount.” He twisted my arm. LOL! Looking back on it, in hindsight, I guess I do have a lot to be stressed about. I’m just not one to let those “stressors” win. Even knowing what I know now, I still won’t. However, I will throw them away with the seaweed as the wave caps come washing up on the shore each time that I’m taking my walks on the beach here in sunny Florida. I’m making the decision to own those stressors and send them packing in the cool gulf waters with the sharks and the bottom feeders on the ocean floor. Yes, yes…that is the best place for her them…on the bottom of the ocean floor – in the darkness for which they so consistently beckon. And today…where am I headed…to the beach of course. Today begins the start of an FL warm-up here in Naples. Our temps are expected to reach the low to mid 80’s over the next 10 days. Not only do I plan to hit that beach over the next several days in order to return to Indiana next week tan and actually looking like I “live” in Florida, but I plan to hit that beach to feed my stressors to the almighty powerful ocean and the monsters that lurk within it. My stressors will soon be their problem now and not mine. And when I report back to my cardiologist in 4-6 weeks, I intend to prove to him that he was right and that the sea is confirmed yet again as a huge and ever so powerful tool in life. Happy, happy, Monday peeps! Make sure you are all de-stressing even if your “sea” is the toilet in your nearest bathroom. Let’s be honest…that is where the stressors best fit anyway – in the commode.

Follow me on my next journey…Angie seaman photography

Hi all. I’m so sorry for the delay in posting here lately. I’ve come to the conclusion that I’d like to have one blog and one blog only. It’s very difficult for me to keep up with my photography business blog as well as this personal blog here on the AGD site. Therefore, I’ve decided to make the official announcement that I’ve closed down my AGD website due to my photography business taking off far more than I ever could have imagined. My photography passion leaves me no time to sew boutique clothing or design jewelry anymore as I always did in the past. Having a new little one also puts a damper on those plans. So…I closed my AGD website and will now be closing this blog too. I plan to leave it up and running so that others can always go back and read how it all began. However, from here on out…I’ll be blogging full time over on my Kitchen Goods photography business blog which can be found by going HERE.

I’ll be blogging not only business there but personal as I always have. Thank you to everyone who has stuck by me since July of 2006 when I first opened this little spot on the web. Your encouragement, support, prayers, comments, compliments, and so on have allowed me to become who I am today. For those of you who never judged me but yet loved me for who I am as well as who I am not…well…I cannot thank you enough. Thank you to my loyal AGD clients for buying my designs as well as for becoming my friends. Angelica Grace Designs was formed during a time when I needed an outlet – back when we were first learning of Kenidi’s special needs diagnosis. AGD and all of its supporters carried me thru the trenches many times when I wanted to curl up into the fetal position and quit. You guys kept me going. Each and every one of you. And yes…even the select few negative n/ellies. You too…pushed me to keep crawling and to keep my head toward the sunshine. Thank you for the drive to be better, the determination to prove others wrong, and the ability to look back and smile – better yet – “grin” from ear to ear. In the end, here I am today. Still swimming. This little part of my world has seen me thru the birth of my children, the birth of two businesses, the re-birth of many personal issues, the re-birth following a move across 4 states, and the many trials of just everyday life in general. Angelica Grace Designs was and always will be my “baby.” I’m very proud of all that AGD accomplished in its short time. It’s very surreal to know others are wearing your designs clear across the country and even across the globe. My international clients are just as important to me as my clients located in the United States. I love all of you and always will. So for now…I ask that you join me on yet another chapter – a new journey. Well not new but you get the point. I ask that we not say goodbye but yet that you stick by my side and watch with us how the next book will unfold. And should you ever find yourself with a need for photography, you know where to find me. Again,

I’ll be HERE (blogging personal and business together). Thank you again from the bottom of my heart. Hope to see you on the flip side at Angie Seaman Photography. Much love, AngiePS…Once on the Angie Seaman Photography blog, there is a way to sign up/subscribe to my blog there just as many of you always had here. Go to the navigation bar on the top of the page and find “subscribe.” You can enter your email address there and opt-in for an email including my most recent posts – every time I post. 🙂